virsh 명령어
리눅스 환경에서 가상머신을 설치하고, 관리하는 virsh 명령어 사용법에 대해서 설명드리도록 하겠습니다. 정의된 XML으로 부터 가상머신을 생성하고, 종료, 삭제하는 방법과 하드웨어 사양을 변경하는 방법을 예제를 통해서 설명드리도록 하겠습니다.
명령어 도움말
virsh 명령어는 가상머신을 생성, 삭제, 관리하는 목적으로 사용됩니다. 쉘에서 가상머신을 제어하기 위해서 바로 명령어를 실행 할 수 있을 뿐만 아니라, virsh 쉘에 접속 하여 가상머신을 제어 할 수 있습니다.
virsh 에서 지원되는 자세한 내용을 확인 하기 위해서는 아래의 명령어를 실행해 주시면 됩니다.
$ virsh --help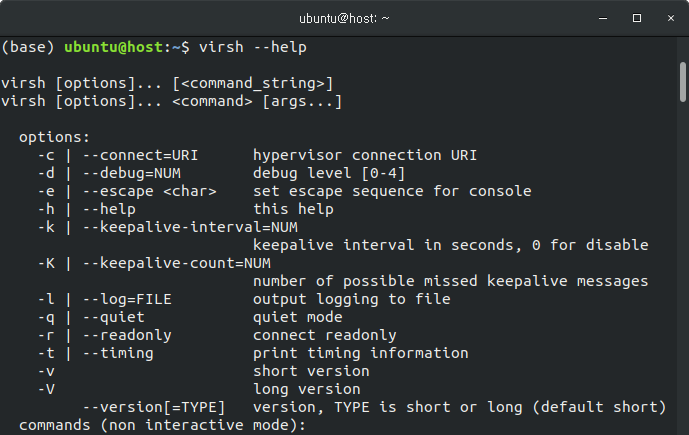
그리고 virsh 쉘에 접속 후에 help 명령어를 입력해도 동일한 도움말 정보가 나타나게 됩니다.
$ virshWelcome to virsh, the virtualization interactive terminal.
Type: 'help' for help with commands
'quit' to quit
virsh # help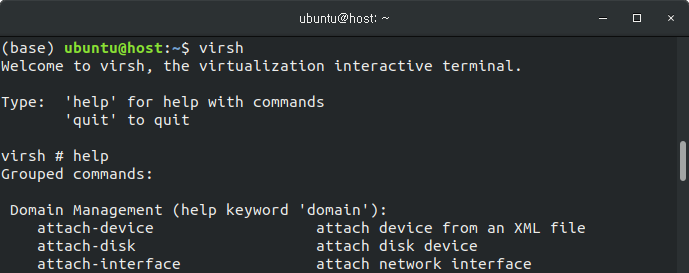
virsh 명령어는 리눅스 쉘에서 아래와 같이 입력합니다.
$ virsh <COMMAND>그리고 아래와 같은 virsh 쉘에서 바로 명령어를 입력하것 또한 동일합니다.
virsh # <COMMAND>가상머신 정의
일반적으로 가상머신을 생성하기 위해서는 virsh-intall 명령어를 생성합니다. 가상머신에 대한 정보를 파라미터로 전달하면서 실행하면 간편하게 가상머신을 생성할 수 있습니다. virsh-install 명령어와 관련된 내용은 아래의 글을 참고해 주시기 바랍니다.
virsh 명령어를 이용하여 가상머신을 생성하기위해서는 가상머신 정보가 정의되어 있는 XML 파일이 필요합니다. 아래와 같은 내용의 XML 파일을 생성하고, 환경에 맞게 내용을 편집합니다.
<domain type='kvm'>
  <name>vm</name>
  <uuid>583ab0a0-777f-4f1d-8f10-735d4d17c154</uuid>
  <memory unit='KiB'>4292608</memory>
  <currentMemory unit='KiB'>4292608</currentMemory>
  <vcpu placement='static'>4</vcpu>
  <os>
    <type arch='x86_64' machine='pc-i440fx-bionic'>hvm</type>
    <boot dev='hd'/>
    <bootmenu enable='no'/>
  </os>
  <features>
    <acpi/>
    <apic/>
    <kvm>
      <hidden state='on'/>
    </kvm>
    <vmport state='off'/>
  </features>
  <cpu mode='host-model' check='partial'>
    <model fallback='allow'/>
  </cpu>
  <clock offset='utc'>
    <timer name='rtc' tickpolicy='catchup'/>
    <timer name='pit' tickpolicy='delay'/>
    <timer name='hpet' present='no'/>
  </clock>
  <on_poweroff>destroy</on_poweroff>
  <on_reboot>restart</on_reboot>
  <on_crash>destroy</on_crash>
  <pm>
    <suspend-to-mem enabled='no'/>
    <suspend-to-disk enabled='no'/>
  </pm>
  <devices>
    <emulator>/usr/bin/kvm-spice</emulator>
    <disk type='file' device='cdrom'>
      <driver name='qemu' type='raw'/>
      <target dev='hda' bus='ide'/>
      <readonly/>
      <address type='drive' controller='0' bus='0' target='0' unit='0'/>
    </disk>
    <disk type='file' device='disk'>
      <driver name='qemu' type='qcow2'/>
      <source file='/data/disks/ubuntu-disk.img'/>
      <target dev='vda' bus='virtio'/>
      <address type='pci' domain='0x0000' bus='0x00' slot='0x07' function='0x0'/>
    </disk>
    <controller type='usb' index='0' model='ich9-ehci1'>
      <address type='pci' domain='0x0000' bus='0x00' slot='0x05' function='0x7'/>
    </controller>
    <controller type='usb' index='0' model='ich9-uhci1'>
      <master startport='0'/>
      <address type='pci' domain='0x0000' bus='0x00' slot='0x05' function='0x0' multifunction='on'/>
    </controller>
    <controller type='usb' index='0' model='ich9-uhci2'>
      <master startport='2'/>
      <address type='pci' domain='0x0000' bus='0x00' slot='0x05' function='0x1'/>
    </controller>
    <controller type='usb' index='0' model='ich9-uhci3'>
      <master startport='4'/>
      <address type='pci' domain='0x0000' bus='0x00' slot='0x05' function='0x2'/>
    </controller>
    <controller type='pci' index='0' model='pci-root'/>
    <controller type='ide' index='0'>
      <address type='pci' domain='0x0000' bus='0x00' slot='0x01' function='0x1'/>
    </controller>
    <controller type='virtio-serial' index='0'>
      <address type='pci' domain='0x0000' bus='0x00' slot='0x06' function='0x0'/>
    </controller>
    <interface type='direct'>
      <mac address='52:54:00:50:bf:73'/>
      <source dev='enp4s0' mode='passthrough'/>
      <model type='virtio'/>
      <address type='pci' domain='0x0000' bus='0x00' slot='0x03' function='0x0'/>
    </interface>
    <serial type='pty'>
      <target type='isa-serial' port='0'>
        <model name='isa-serial'/>
      </target>
    </serial>
    <console type='pty'>
      <target type='serial' port='0'/>
    </console>
    <channel type='spicevmc'>
      <target type='virtio' name='com.redhat.spice.0'/>
      <address type='virtio-serial' controller='0' bus='0' port='1'/>
    </channel>
    <input type='tablet' bus='usb'>
      <address type='usb' bus='0' port='1'/>
    </input>
    <input type='mouse' bus='ps2'/>
    <input type='keyboard' bus='ps2'/>
    <graphics type='spice' autoport='yes'>
      <listen type='address'/>
      <image compression='off'/>
    </graphics>
    <sound model='ich6'>
      <address type='pci' domain='0x0000' bus='0x00' slot='0x04' function='0x0'/>
    </sound>
    <video>
      <model type='qxl' ram='65536' vram='65536' vgamem='16384' heads='1' primary='yes'/>
      <address type='pci' domain='0x0000' bus='0x00' slot='0x02' function='0x0'/>
    </video>
    <hostdev mode='subsystem' type='pci' managed='yes'>
      <source>
        <address domain='0x0000' bus='0x01' slot='0x00' function='0x0'/>
      </source>
      <address type='pci' domain='0x0000' bus='0x00' slot='0x08' function='0x0'/>
    </hostdev>
    <redirdev bus='usb' type='spicevmc'>
      <address type='usb' bus='0' port='2'/>
    </redirdev>
    <redirdev bus='usb' type='spicevmc'>
      <address type='usb' bus='0' port='3'/>
    </redirdev>
    <memballoon model='virtio'>
      <address type='pci' domain='0x0000' bus='0x00' slot='0x09' function='0x0'/>
    </memballoon>
  </devices>
</domain>
그리고 다음과 같이 가상머신을 정의하는 명령어를 실행합니다.
$ virsh define {XML FILE}가상머신이 정의되면 start 명령어로 가상머신을 부팅 할 수 있습니다.
$ virsh start {VM NAME}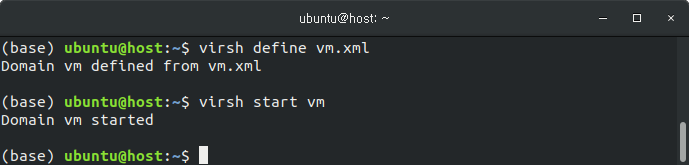
가상머신을 생성하기 위해서 정의된 XML으로부터 create 명령어를 사용하여 가상머신을 생성할 수 있습니다.
하지만 create 명령어로 가상머신을 생성하였을 경우 가상머신이 종료되면 자동으로 삭제 되기 때문에 생성된 가상머신을 계속하여 사용하기 위해서는 define 명령어를 이용하여 가상 머신을 생성해 주시기 바랍니다.
가상머신 확인
생성된 가상머신은 list 명령어로 확인 할 수 있습니다.
아래와 같은 명령어를 실행하면 전체 실행중인 가상머신 목록을 확인 할 수 있습니다.
$ virsh list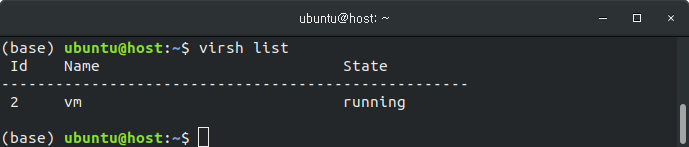
위의 명령어는 현재 실행 중인 가상머신 목록을 확인 할 수 있는데, 종료된 가상머신을 포함하여 확인 하기 위해서는 다음 명령어를 실행하면 됩니다.
$ virsh list --all가상머신 접속
가상머신에 접속하기 위해서는 아래와 같은 명령어를 사용하면됩니다.
$ virt-viewer {VM NAME}{VM NAME} 대신에 가상머신 이름을 지정하면 되는데, 만약 vm 이라는 가상머신에 접속하기 위해서는 다음과 같은 명령어를 실행하면 됩니다.
$ virt-viewer vm가상머신 정지 및 재개
가상 머신을 정지하기 위해서는 아래와 같은 명령어를 실행하면 됩니다.
$ virsh suspend {VM NAME}그리고 정지된 가상머신을 다시 실행 하기 위해서는 다음 명령어를 실행하면 됩니다.
$ virsh resume {VM NAME}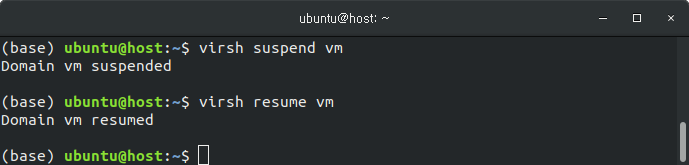
가상머신 종료
현재 실행중인 가상머신을 종료하기 위해서는 아래와 같이 실행하면 됩니다.
$ virsh shutdown {VM NAME}
가상 머신 삭제
가상머신을 삭제하기 위해서는 undefine 명령어를 이용합니다.
$ virsh undefine {VM NAME}
가상머신 수정
가상머신의 하드웨어 등의 사양을 수정하기 위해서는 다음과 같이 edit 명령어를 실행하면 됩니다.
$ virsh edit {VM NAME}
( 본문 인용시 출처를 밝혀 주시면 감사하겠습니다.)