구글 Colaboratory 사용법
Colaboratory 구글에서 제공하는 무료 Jupyter 노트입니다.
브라우저에서 Python 코드를 실행할 수 있고 무료 GPU와 TPU 등의 컴퓨팅 자원을 함께 사용할 수 있습니다.
이 글에서는 예제 코드를 Colaboratory 에서 실행해 보면서, Colaboratory 사용법에 대해서 설명드리도록 하겠습니다.
Jupyter 노트 환경
구글 Colaboratory 환경은 Jupyter Notebook을 이용해 본 경험이 있으시면 익숙하게 사용가능하실 것입니다.
Jupyter 노트는 정적인 페이지가 아니고 Python 등의 언어로 코드를 작성하고 실행할 수 있는 대화형 환경입니다.
전체 소스코드를 실행시키는 것이 아니라, 각각의 셀로 나눠서 실행 할 수 있습니다. Jupyter Notebook 설치와 사용법 등은 아래의 글을 참고해 주시기 바랍니다.
Colaboratory 접속
아래의 페이지에 접속하시면, 다음같은 화면이 나타납니다. 이 곳에서 코드를 작성하고 실행, 저장 등의 모든 작업이 가능합니다.
https://colab.research.google.com/

구글 Colaboratory 사용법
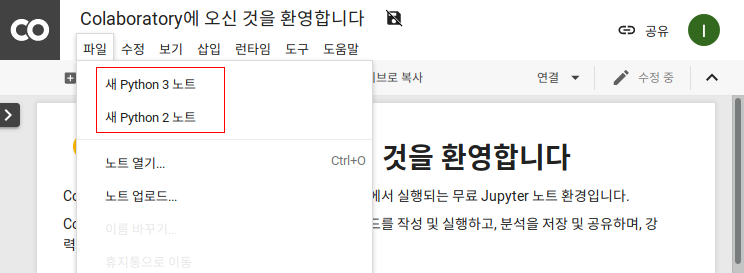
먼저 예제 파일을 작성하기 위해서, [파일] 메뉴 버튼을 클릭하고 새 Python 노트 메뉴를 선택합니다.
Python 코드 실행
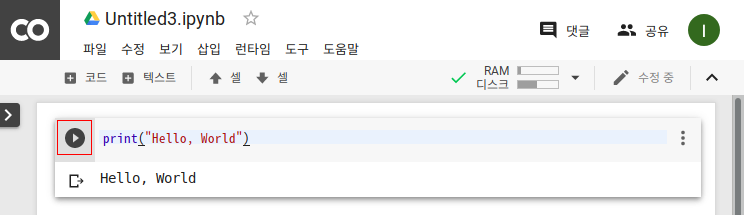
새로운 노트가 생성되는데, 아래와 같이 Python 코드를 작성합니다.
print("Hello, World")그리고 좌측의 작은 삼각형 모양의 실행 버튼을 클릭하면, 아래와 같이 코드가 실행되게 됩니다.
런타임 메뉴를 이용하여 각 셀 별로 코드를 나눠서 실행 할 수 있을 뿐만 아니라, 전체 코드를 한 번에 실행 할 수 도 있습니다.
쉘 명령어 실행
편집기 화면에서는 기본적으로 Python 코드를 실행할 수 있지만, 쉘 명령어 또한 실행할 수 있습니다. 쉘 명령어를 실행하기 위해서는 명령어 앞에 ‘!’ 기호를 입력하여 실행하면 됩니다.
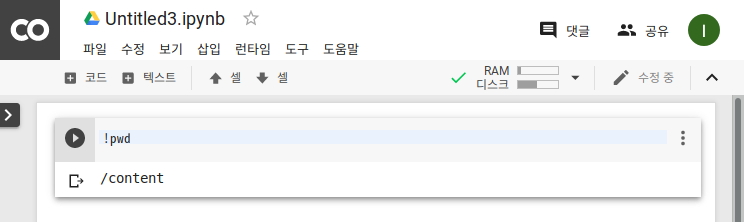
위의 내용은 현재의 디렉터리 위치를 확인하는 명령어인 pwd 명령어를 실행한 결과입니다.
무료 GPU 사용
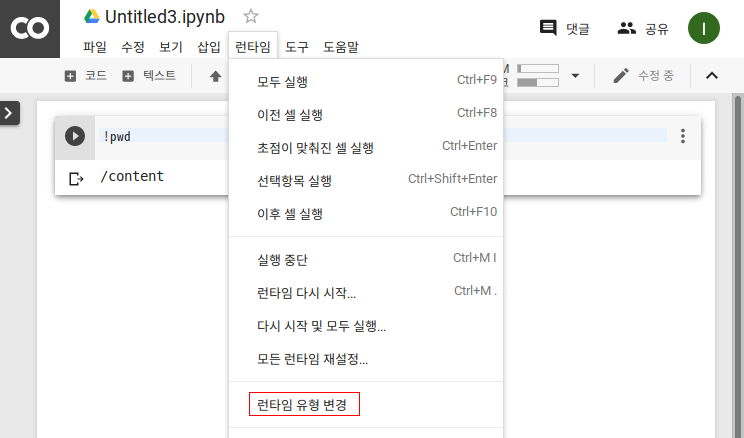
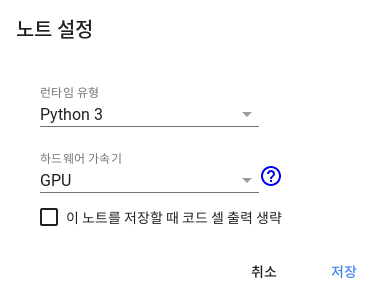
구글 Colaboratory 에서는 무료 GPU 또한 사용이 가능합니다. GPU 또는 TPU를 사용하기 위해서는 런타임 유형을 변경해야 합니다. [런타임] 메뉴에서 [란타임 유형 변경] 메뉴를 클릭합니다.
그리고 나타나는 노트 설정 팝업에서 하드웨어 가속기를 GPU 으로 선택합니다. 무료로 TPU 또한 선택하여 사용이 가능합니다.
실제 GPU를 사용할 수 있는지 GPU 정보를 확인 할 수 있는 nvidia-smi 명령어를 실행해 보도록 하겠습니다.
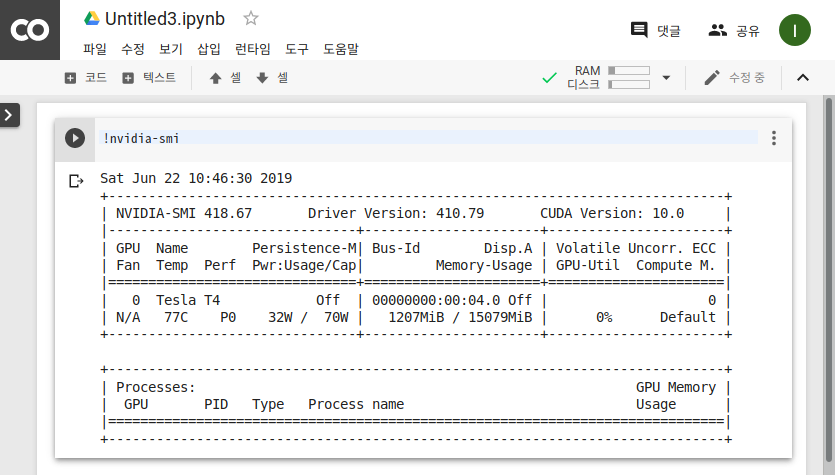
nvidia-smi 명령어 실행 결과 GPU 정보가 출력되고 있음을 알 수 있습니다.
이제 GPU를 사용할 수 있는 예제 코드를 작성해 보도록 하겠습니다. 이 글에서는 아래의 예제 코드를 사용하도록 하겠습니다. CPU 와 GPU의 성능을 비교해 볼 수 있는 예제 입니다.
import tensorflow as tf
import timeit

# See https://www.tensorflow.org/tutorials/using_gpu#allowing_gpu_memory_growth
config = tf.ConfigProto()
config.gpu_options.allow_growth = True

with tf.device('/cpu:0'):
  random_image_cpu = tf.random_normal((100, 100, 100, 3))
  net_cpu = tf.layers.conv2d(random_image_cpu, 32, 7)
  net_cpu = tf.reduce_sum(net_cpu)

with tf.device('/gpu:0'):
  random_image_gpu = tf.random_normal((100, 100, 100, 3))
  net_gpu = tf.layers.conv2d(random_image_gpu, 32, 7)
  net_gpu = tf.reduce_sum(net_gpu)

sess = tf.Session(config=config)

# Test execution once to detect errors early.
try:
  sess.run(tf.global_variables_initializer())
except tf.errors.InvalidArgumentError:
  print(
      '\n\nThis error most likely means that this notebook is not '
      'configured to use a GPU.  Change this in Notebook Settings via the '
      'command palette (cmd/ctrl-shift-P) or the Edit menu.\n\n')
  raise

def cpu():
  sess.run(net_cpu)

def gpu():
  sess.run(net_gpu)

# Runs the op several times.
print('Time (s) to convolve 32x7x7x3 filter over random 100x100x100x3 images '
      '(batch x height x width x channel). Sum of ten runs.')
print('CPU (s):')
cpu_time = timeit.timeit('cpu()', number=10, setup="from __main__ import cpu")
print(cpu_time)
print('GPU (s):')
gpu_time = timeit.timeit('gpu()', number=10, setup="from __main__ import gpu")
print(gpu_time)
print('GPU speedup over CPU: {}x'.format(int(cpu_time/gpu_time)))

sess.close()
그리고 GPU를 사용 할 수 있는지 예제 코드를 실행하면 아래와 같이 결과가 나타나게 됩니다.

Tensorflow 예제 실행결과 GPU가 CPU와 비교하였을 경우 연산이 26배 정도 빠른 것을 확인 할 수 있습니다.
( 본문 인용시 출처를 밝혀 주시면 감사하겠습니다.)