Doxygen 사용법
Doxygen 설치 후 사용 방법을 예제 C++, Python 소스코드를 사용하여 설명드리도록 하겠습니다. Doxygen이란 소스코드내에 주석을 사용하여 문서화 할 수 있는 소프트웨어 패키지입니다.
Doxygen 설치
우분투 환경환경일 경우 아래의 명령어를 이용하여 Doxygen을 설치할 수 있습니다. graphviz 패키지를 함께 설치해 주셔야 소스코드를 문서화 할 때 클래스 다이어그램 등을 함께 생성하실 수 있습니다.
$ sudo apt install doxygen doxygen-gui graphviz-dev graphvizDoxygen 설정 파일 생성
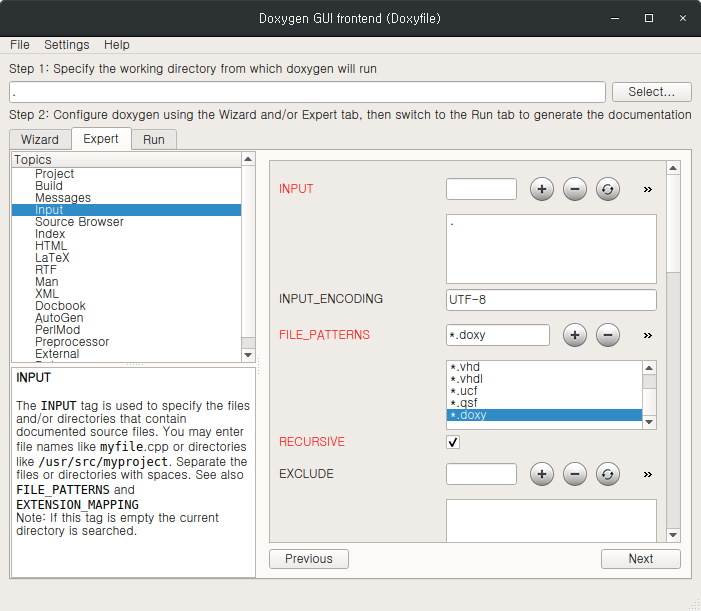
가장 먼저 소스코드 최상위 디렉터리에서 Doxygen 설정 파일을 생성해 주셔야 합니다. 설정 파일은 소스코드 리렉터리에서 doxywizard 명령어를 실행하면 다음과 같은 윈도우가 생성됩니다.
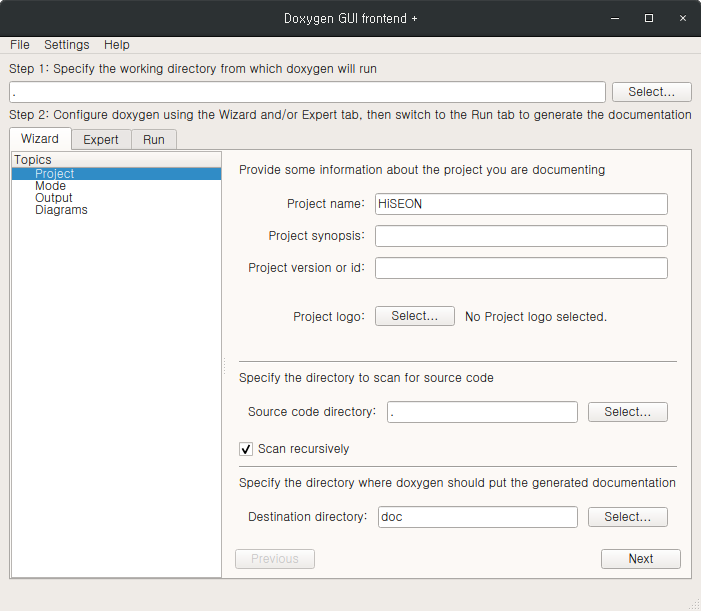
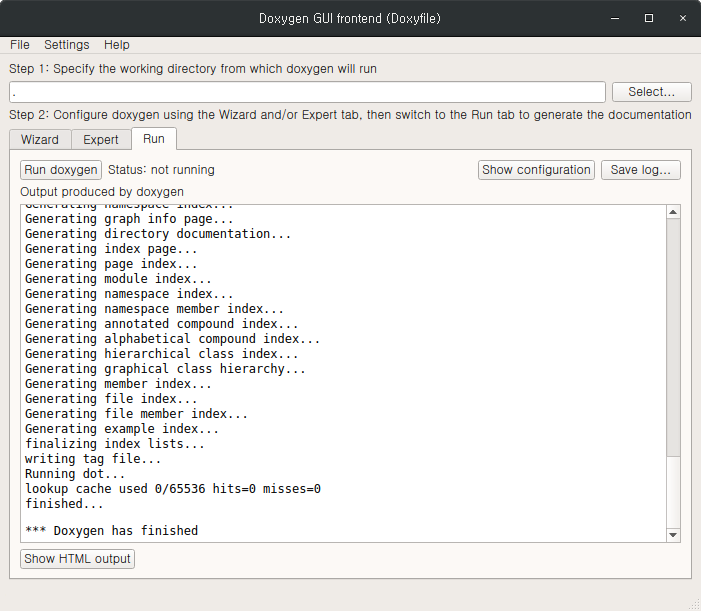
위와 같이 기본적인 설정 내용을 입력합니다. 그리고 다음 [Run] 탭에서 [Run Doxygen] 버튼을 클릭하면 문서가 생성되게 됩니다.
그리고 설정이 이뤄진 Doxygen 파일을 소스코드 디렉터리에 저장합니다. 저장 후에 소스코드 디렉터리는 아래와 같은 파일들이 생성 된 것을 확인 할 수 있습니다.
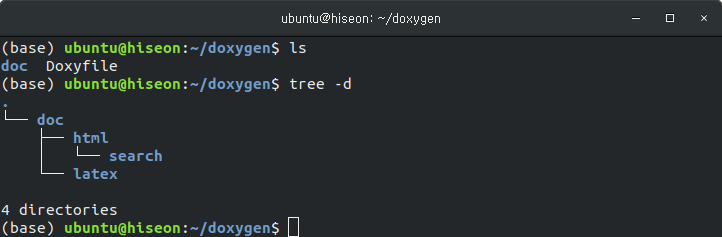
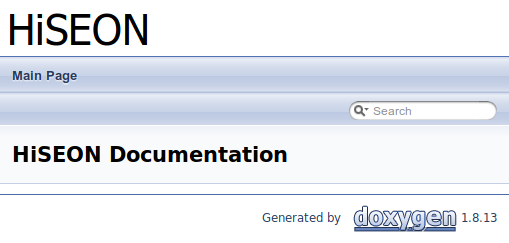
doc/html 디렉터리의 index.html 파일을 실행하면 다음과 같은 Doxygen 문서 페이지를 확인 할 수 있습니다.
페이지 생성
소스코드를 설명하는 페이지 또는 환경, 설치 안내 페이지 등을 생성하는 방법입니다. doxy 디렉터리를 생성하고, page.doxy 파일의 내용을 다음과 같이 생성합니다.
/*! \mainpage Drawing Shapes
*
* This project helps user to draw shapes.
* Currently two types of shapes can be drawn:
* - \subpage apage "How to draw rectangle?"
*
* - \subpage bpage "How to draw circle?"
*
*/
/*! \page apage How to draw rectangle?
*
* Lorem ipsum dolor sit amet
*
*/
/*! \page bpage How to draw circle?
*
* This page is about how to draw a circle.
* Following sections describe circle:
* - \ref hi "kkkk"
*/
/*! \page hi Hello!! World!!
* a, b
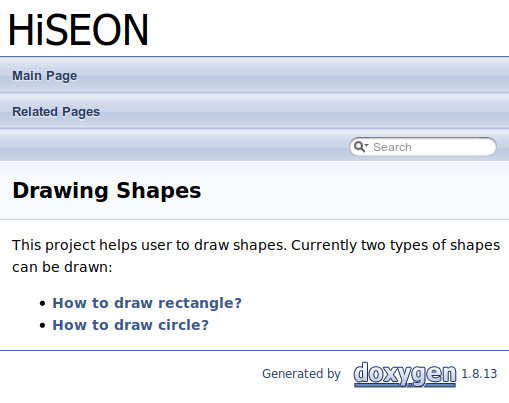
*/그리고 Doxygen 설정 내용 중에서 FILE_PATTERNS 에서 *.doxy 확장자를 추가하고, [Run] 탭에서 Doxygen 문서를 생성합니다.
생성된 문서를 확인하면, 다음과 같이 페이지 등이 생성된 것을 확인 할 수 있습니다.
Doxygen 주석 사용법
소스코드 내에서 Doxygen 주석을 작성하는 방법에 대해서 설명드립니다.
C++ 예제
C++ 언어는 아래와 같은 형태로 주석을 작성하게 됩니다.
/*! A test class */
class Afterdoc_Test
{
public:
/** An enum type.
* The documentation block cannot be put after the enum!
*/
enum EnumType
{
int EVal1, /**< enum value 1 */
int EVal2 /**< enum value 2 */
};
void member(); //!< a member function.
protected:
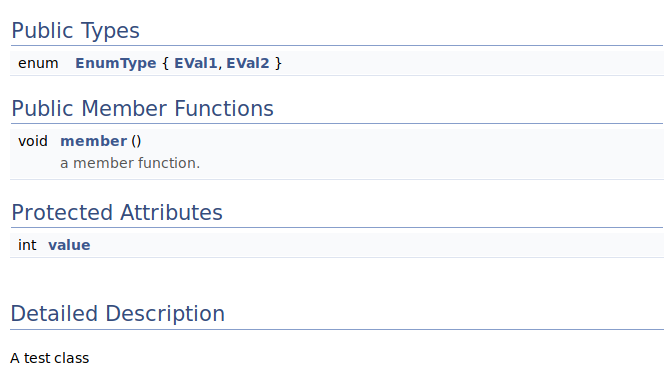
int value; /*!< an integer value */
};위의 소스코드를 문서화 하였을 경우, 아래와 같은 문서가 생성되게 됩니다.
Python 예제
Python에서 소스코드 주석은 다음과 같은 형태로 작성하게 됩니다.
"""@package docstring
Documentation for this module.

More details.
"""

def func():
    """Documentation for a function.

    More details.
    """
    pass

class PyClass:
    """Documentation for a class.

    More details.
    """

    def __init__(self):
        """The constructor."""
        self._memVar = 0;

    def PyMethod(self):
        """Documentation for a method."""
        pass
그리고 Python의 경우 다음과 같은 형태로 주석을 생성할 수도 있습니다.
## @package pyexample
#  Documentation for this module.
#
#  More details.

## Documentation for a function.
#
#  More details.
def func():
    pass

## Documentation for a class.
#
#  More details.
class PyClass:

    ## The constructor.
    def __init__(self):
        self._memVar = 0;

    ## Documentation for a method.
    #  @param self The object pointer.
    def PyMethod(self):
        pass

    ## A class variable.
    classVar = 0;

    ## @var _memVar
    #  a member variable
보다 많은 종류의 주석 예제는 아래의 페이지를 참고해 주시기 바랍니다.
http://www.doxygen.nl/manual/docblocks.html
추가 내용으로 C++ 코드 작성시 구글 코딩가이드에 맞춰서 작성하는 방법은 아래의 글을 참고해 주시기 바랍니다.
( 본문 인용시 출처를 밝혀 주시면 감사하겠습니다.)